The Room That Gained Four Feet Without Losing a Wall
I want to tell you about a before-and-after that involved no renovation, no new furniture, no paint, and a total expenditure of approximately $180.
The room was a second bedroom in an apartment I was renting — the kind of room that real estate listings describe as a “versatile bonus space” because “small second bedroom” would be accurate but discouraging. It was 9 feet by 11 feet. One window, north-facing, which meant the natural light was consistent and flat rather than warm and directional. Ceilings at eight feet, which is standard but felt lower than standard because the room was narrow enough that the width-to-height ratio made the ceiling feel pressing. The walls were the kind of off-white that isn’t quite any color and isn’t quite white, the specific non-color of rooms that have been painted by landlords with the cheapest available product and no particular intention.
The room felt like a box. Not a charming, intimate, jewel-box small room. A box. The kind of room you use for storage and apologize to guests about.
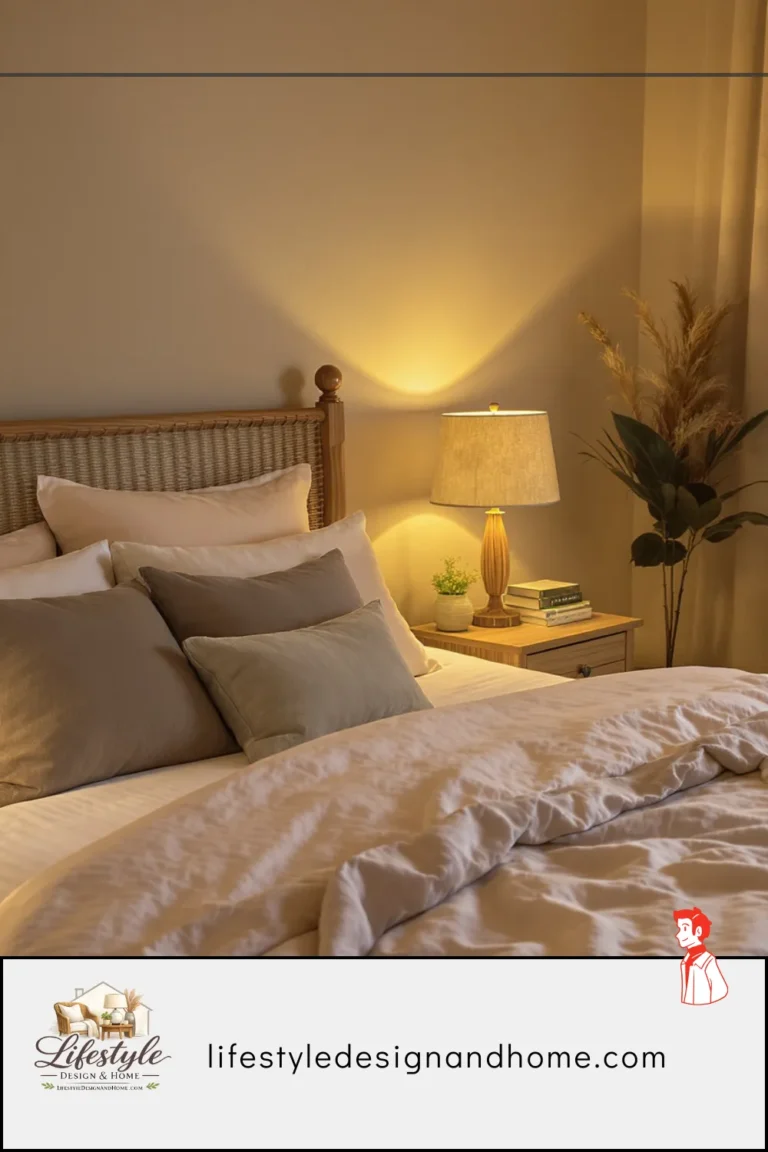
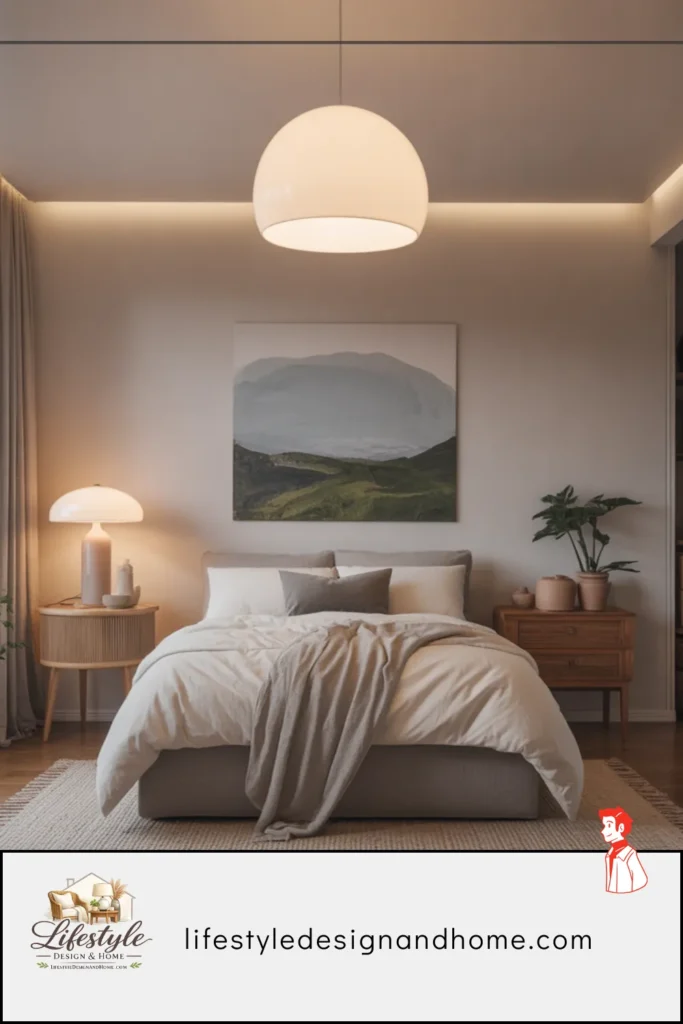
I spent one afternoon on it. I replaced the single overhead bulb with a warm 2700K LED on a dimmer. I added a tall torchiere floor lamp in the corner opposite the window, which bounced light off the ceiling and the two corner walls. I added a small table lamp on the desk that put warm light at seated height on the right side of the room. I hung a large mirror — 36 by 48 inches, leaned against the wall opposite the window — that reflected the window and the torchiere simultaneously. And I replaced the center overhead as the room’s primary source by using only the floor lamp and table lamp in the evening, with the overhead dimmed to about 20 percent.
I walked out of the room, waited a few minutes, and walked back in.
The room was the same room. Nine by eleven feet. Same ceilings. Same north-facing window. Same walls. But the quality of it — the way it read, the way it felt, the way my brain processed it when I stepped through the door — was different in a way that is hard to describe without resorting to the cliché of “larger,” which is technically inaccurate and experientially exact. The room felt like it had more room in it. Not four feet more. Not measurably more. But genuinely, unmistakably, experientially more.
$180. One afternoon. A room that stopped being a box.
That afternoon is why I care about lighting and perceived space more than almost any other design topic. Because the gap between what a room is and what a room feels like is almost entirely determined by light — and light is the variable most completely within your control.
Why Light Changes Perceived Space: The Science You Need
I want to spend real time on the why before we get to the how, because understanding why these tricks work makes you better at applying them and better at adapting them to rooms that don’t match anyone’s example.
The human brain does not experience rooms by measuring them. It experiences rooms by processing the visual information available — the distribution of light and shadow, the revealed and unrevealed surfaces, the perceived depth of space — and constructing an impression of size from that information. That impression is not always accurate. It can be manipulated. And the manipulation is almost entirely done with light.
How the brain estimates room size:
The brain uses several visual cues to estimate the size of a space. Edge detection — the visible boundaries of walls, ceiling, and floor — is one of the most important. When edges are clearly lit and distinct, the brain can accurately calculate the room’s volume. When edges are softened by shadow, or when the boundaries between surfaces are made ambiguous by matching colors or gradual light transitions, the brain loses its ability to precisely calculate and defaults to a rough impression that typically runs larger than the measured reality.
This is the core mechanism behind almost every lighting trick in this article: by softening edges, by revealing some boundaries and concealing others, by creating the impression of depth beyond the room’s actual walls, we disrupt the brain’s edge-detection process and produce an impression of more space than is actually present.
The shadow principle:
Uniform overhead light is the enemy of perceived space. When every corner is equally illuminated, when every edge is equally visible, when the ceiling and walls are all the same brightness, the brain processes the room at its exact dimensions. Nothing is hidden. Nothing extends beyond what’s there.
Shadow is depth. When a corner falls into gentle shadow, the brain cannot determine exactly where that corner ends. The room could extend further. The corner might have more depth than it appears. The brain, uncertain, resolves the ambiguity toward larger rather than smaller — because in natural environments, shadows typically indicate the presence of more space rather than less.
This is why dimly lit rooms often feel larger than brightly lit ones, despite the intuition that more light should reveal more space. More light reveals more boundary. Less light in the right places conceals boundary and implies depth.
The height principle:
Human perception of room size is disproportionately influenced by perceived ceiling height. A room that reads as tall reads as spacious, regardless of its floor plan. A room that reads as low reads as cramped, regardless of how wide it is.
Lighting that draws the eye upward — that illuminates the ceiling and the upper walls — creates the impression of height even when the actual ceiling height hasn’t changed. Lighting that sits low and doesn’t reach the ceiling makes the upper portion of the room disappear, which the brain reads as the room being shorter and therefore smaller.
The reflection principle:
Every light source has a visual reach determined by what it illuminates directly and what it bounces off. A lamp that illuminates a mirror creates two light sources — the original and the reflected. A mirror positioned to reflect a window creates two windows. A light source positioned to reflect off a large, light-toned surface doubles its apparent presence in the room.
This reflection principle is how a single floor lamp in the right corner can seemingly light an entire room, because it is lighting the corner walls and the ceiling, which then become secondary light sources that distribute light in all directions. The original lamp is one source. The surfaces it illuminates are dozens more.
These three principles — shadow as depth, height as spaciousness, reflection as multiplication — are the mechanics behind every trick in this article. Keep them in mind, and you’ll be able to apply the tricks to rooms I haven’t described and situations I haven’t anticipated.
Trick 1: Replace Every Bulb With 2700K and Watch What Happens
This is not a trick in the dramatic sense. It doesn’t require moving furniture, buying fixtures, or any particular skill. It requires replacing light bulbs and costs approximately $15 to $30, depending on how many bulbs your room has.
It is also, in my experience, the single highest-return lighting change most people can make — because most rooms are not lit at the right color temperature and the wrongness of that temperature is doing quiet damage to the room’s perceived quality every hour it’s in use.
The specific problem: rooms lit at 4000K to 5000K — the neutral-to-cool range that most builder-grade and hardware store bulbs default to — are not warmer, brighter, or more spacious as a result. They are flatter. The cool blue-spectrum light reduces the contrast between surfaces, makes shadows appear grey rather than warm, and produces a quality of illumination that the brain associates with commercial spaces — offices, retail stores, hospitals — rather than residential ones. Commercial associations create an impression of utility rather than habitation, and utility does not feel spacious.
Warm 2700K light does something technically interesting: it increases the perceived contrast between lit surfaces and shadow. Because the lit surfaces appear amber-warm and the shadows appear relatively cooler by contrast, the room has more apparent depth. The warm pool and the cool shadow read as different zones rather than as a uniform field of illumination. The brain reads zones as depth, depth as space.
I replaced the bulbs in the small north-facing room with 2700K LEDs and it was the first thing I did. The room immediately looked warmer and slightly less box-like before I made any other change. The flat grey quality of the cool light had been doing damage I hadn’t consciously identified.
The additional detail that matters: CRI, or Color Rendering Index. A 2700K bulb with a CRI below 80 can still produce a slightly off, slightly greenish warmth that doesn’t quite read correctly. Look for 2700K bulbs with CRI of 90 or above. They cost slightly more and they are noticeably better — the warmth is genuine and full-spectrum rather than an approximation of warmth.
Trick #2: The Torchiere Corner Lamp — The Trick That Changes Everything
This is the trick I used in the north-facing room. It is the trick my designer friend recommended in the living room that I described in another article in this series. It is the trick that appears, in my experience, in every room that has been successfully made to feel larger through lighting alone.
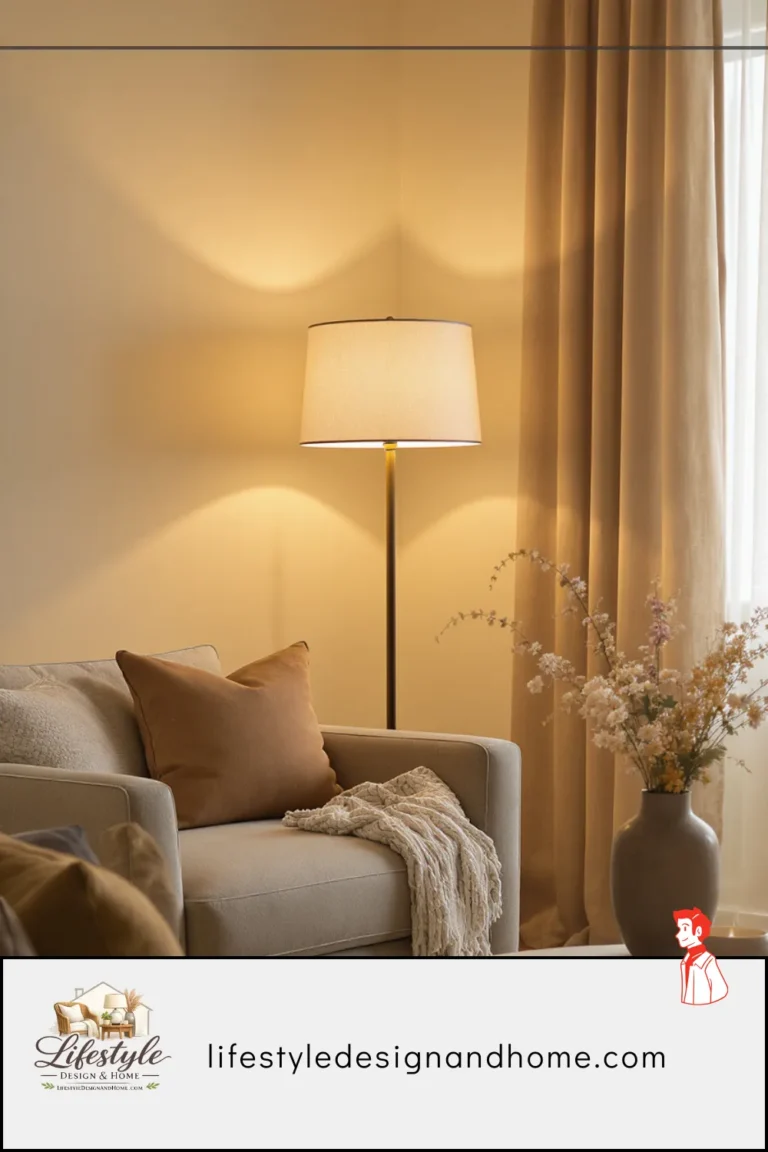
A torchiere floor lamp — a lamp with an upward-facing shade that directs light toward the ceiling — placed in the corner that receives least natural light, changes the room in three ways simultaneously.
It addresses the room’s dark zone. The corner furthest from the window is the room’s greatest lighting liability. It creates a shadow that the brain reads as the room ending there — as the room being smaller than it is. When that corner is lit, the shadow disappears and the brain can no longer determine exactly where the room ends. The room feels larger because its boundary is less visible.
It lights the ceiling. The torchiere bounces light off the ceiling, which becomes a secondary source distributing diffuse light throughout the room. This is lighting from above — not from the ceiling fixture, which is a point source, but from the entire ceiling, which is an area source. Area sources produce the soft, diffuse light that feels spacious in the way that point sources never can.
It lights both corner walls. A torchiere in a corner illuminates both walls of that corner from floor to ceiling. Both walls become secondary light sources. The room is now being lit from the center (overhead), from one corner (torchiere), and reflected from two walls. The distribution is multi-directional and the room reads as genuinely larger.
The specific placement detail: the torchiere should go in the corner diagonally opposite the window — the corner that receives least natural light. In my 9-by-11-foot room, this was the corner beyond the desk, away from the window, the furthest point from any natural light source. Putting the torchiere there didn’t just light the corner. It made the room feel like it extended to the corner rather than ending before it.
Bulb recommendation for torchieres: a 2700K LED bulb rated for the fixture’s maximum wattage, on a dimmer if possible. The torchiere should not be at full brightness in most rooms — it produces more light than is needed for atmosphere and the light becomes harsh rather than diffuse. 60 to 70 percent is usually the right setting.
Trick #3: Mirrors Positioned to Reflect Light, Not Faces
This is the trick most people know about and most people get wrong.
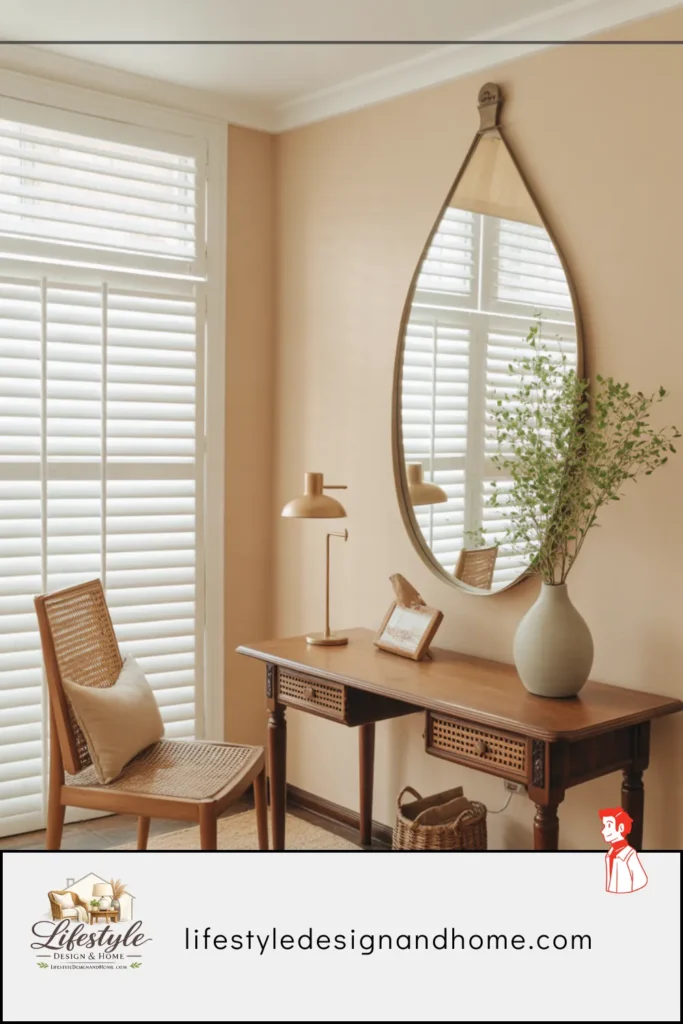
The common understanding: mirrors make rooms look bigger. This is true. The less commonly understood qualification: mirrors make rooms look bigger only when they reflect something that creates the impression of depth or additional space. A mirror reflecting a blank wall makes the blank wall twice as large. A mirror reflecting a doorway makes the doorway appear to lead to two spaces. A mirror reflecting a window makes the window appear twice as wide and twice as bright. A mirror reflecting a lit torchiere lamp makes the lamp appear to exist in two places, creating the impression of two sources rather than one.
The difference between a mirror that works and a mirror that doesn’t is almost entirely about what it reflects.
The position that works best in small rooms: directly opposite the room’s primary light source — the window during the day, the primary lamp source in the evening. A mirror on the wall opposite the window reflects the window back into the room, creating the impression of a second window. The room doubles its apparent natural light. The brain processes two windows and estimates a room large enough to have two walls with windows.
In the north-facing room, I leaned the large mirror against the wall opposite the window. During the day, it reflected the window and the grey northern sky — less dramatic than a south-facing window but still effective. In the evening, it reflected the torchiere lamp. The two combined — a reflected window and a reflected lamp — produced a room that felt significantly larger than its dimensions at every hour.
The size principle: a mirror that makes a room feel larger is a large mirror. Not a 20-inch decorative mirror. Not a series of small mirrors in a gallery arrangement. A large mirror — 36 inches wide at minimum, preferably larger — that acts as a visual window into apparent additional space. Small mirrors reflect small portions of the room. Large mirrors reflect large portions and create the impression of depth and extension that makes the brain revise its size estimate upward.
The lean versus hang question: I prefer leaning large mirrors against walls in smaller rooms because a leaned mirror reflects a slightly downward-angled view of the room — more floor, more lower wall, more of the room at human-experience level — which reads as more natural than a mirror hung flat that reflects a perpendicular slice of the room. The leaned position also allows repositioning experiments without wall damage.
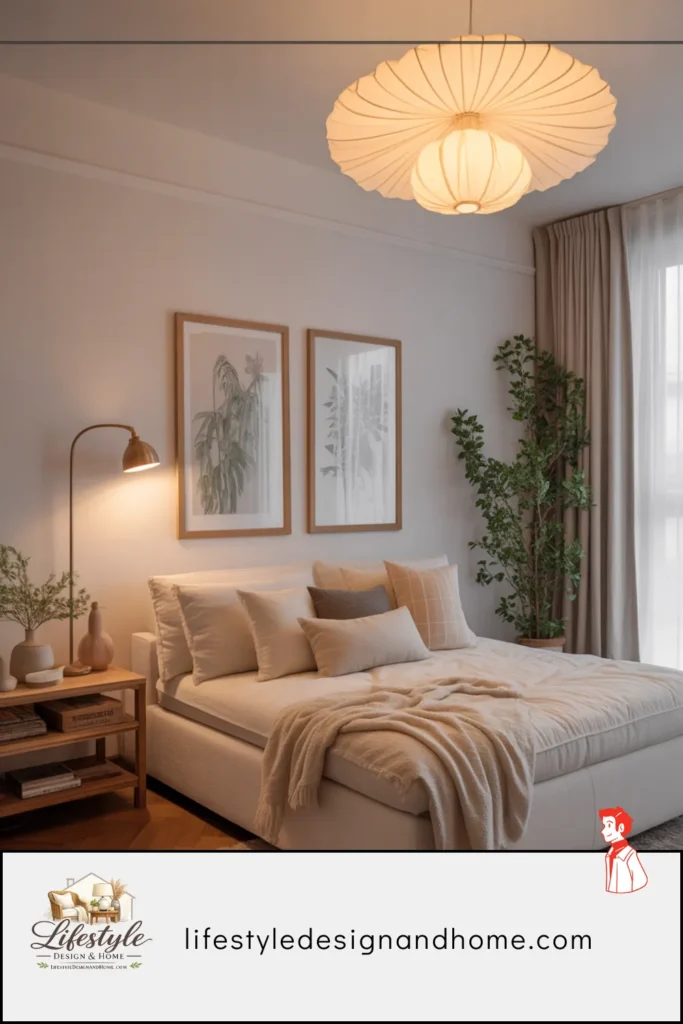
Trick #4: Curtains at Ceiling Height on Every Window
I have written about this in several articles in this series because it comes up in so many contexts — balanced design, perceived space, bedroom calm. I am writing about it again here because in the context of making small rooms feel larger through lighting, it has a specific effect that is distinct from its purely aesthetic benefits.
A window is a light source. The size of that light source — the width and height of the glass area that admits light — determines how much light enters the room and at what angles. A small window in a small room produces a limited cone of light that illuminates a limited portion of the room.
Ceiling-height curtains, hung with the rod mounted four to six inches below the ceiling and the panels extending six to eight inches past the window frame on each side, do not change the window’s actual dimensions. But they change the perceived dimensions dramatically. The eye follows the curtain from floor to ceiling, reads the full height as the window’s height, and perceives the window as larger than it is. More apparent window means more apparent light. More apparent light means a more spacious room.
In my north-facing room, the window was modest — approximately 30 inches wide and 48 inches tall, standard for the building. I couldn’t change the window. But I could hang curtains that made it appear to be a floor-to-ceiling window that ran nearly the full width of the wall. The fabric extended from the ceiling to the floor. When open, the curtains stacked beyond the window frame on both sides, revealing the full glass. The room appeared to have a much larger window than it actually did.
The light trick this creates: the brain estimates room size partly based on its apparent light source — larger light source implies larger room to contain it. A room with a small window reads as a small room. A room that appears to have a large floor-to-ceiling window reads as a room large enough to have that kind of window. The curtain creates the impression without changing the reality, and the impression changes the room’s perceived size.
The fabric matters: sheer or lightweight fabric that diffuses rather than blocks light is essential for small rooms. Heavy blackout curtains that happen to be hung at ceiling height do not produce this effect because they block the light that creates it. Sheer linen, cotton voile, lightweight natural fabrics — these diffuse the light through the fabric, creating a soft glowing surface rather than a curtained wall. The glowing surface reads as a light source in itself.
Trick #5: Eliminate the Single Overhead and Layer Downward
This is the counterintuitive one. More light from more sources should make the room feel larger, right?
Only when the sources are at the right heights and in the right distribution. A single overhead source at full brightness illuminates the room uniformly — every edge visible, every corner defined, every boundary clear. The brain processes this with precision and produces an accurate estimate of the room’s dimensions.
Eliminating the single overhead as the dominant source — dimming it to 20 or 30 percent and relying on floor lamps and table lamps for primary illumination — does something specific. It moves the room’s primary light sources downward, which means the upper portion of the room — the ceiling and upper walls — receives less direct light. The ceiling recedes slightly. The upper walls become less distinct. The room’s upper boundaries become softer.
This is the counterintuitive part: a room whose ceiling is slightly less visible reads as taller, not shorter, because the brain can no longer precisely calculate where the ceiling is. The ceiling that recedes into gentle shadow implies height more effectively than the ceiling fully illuminated by an overhead fixture.
The specific configuration I use:
Overhead on dimmer at 20 to 30 percent — enough to maintain a general sense of the room’s volume without sharply defining every boundary. Floor lamp in the dark corner at 60 to 70 percent — this does the heavy lifting for ambient light. Table lamp or secondary floor lamp at 50 to 60 percent — this adds the second source at a different height and distance that creates depth. Result: a room lit from multiple angles, at multiple heights, with no single source dominant. The room has more apparent depth and height than it does under the overhead alone.
In the north-facing room, the overhead light, dimmed to 20 percent, was barely present. The torchiere did the ambient work. The desk lamp provided a task light. The three sources together produced a room that felt more dimensional than the single overhead ever had.
Trick #6: Use Light to Define Zones Within a Small Room
This trick applies most powerfully in rooms that serve multiple functions — a bedroom that also functions as a home office, a living room that also contains a dining area, a studio apartment where the entire life of the place happens in one space.
In multi-purpose small rooms, the lighting challenge is that everything needs to work for everything, which usually means everything is compromised. The light bright enough for desk work is too bright for winding down. The light warm enough for the bedroom atmosphere is too dim for focused reading.
The zone-definition approach addresses this by using lighting to create distinct areas within the same room — not physically separated, but visually identified as distinct through their different light qualities.
How it works: The desk zone has a task lamp at 3000 to 3500K at sufficient brightness for focused work. The sleeping or relaxing zone has warm lamps at 2700K at lower brightness. The dining area has a pendant or focused lamp at 2700K that pools warm light over the table and lets the surrounding space recede.
Each zone has different light. The brain reads different light as different spaces. The room feels larger because it contains multiple distinct environments rather than one uniform environment.
The specific effect on perceived size: defined zones read as larger than undefined zones because the brain assigns each zone its own spatial estimate and then sums them. A room with two clearly distinct lighting zones reads as “two areas” rather than “one small room.” The sum of two areas is typically larger than the estimate for a single room with the same actual dimensions.
I used this in my studio apartment, and it was the single most effective spatial trick available in a space where everything shared one floor plan. The sleeping area, lit by warm, low bedside lamps at 2700K, felt like a bedroom. The desk area, lit by a cooler task lamp at 3000K, felt like a study. The sitting area, lit by a floor lamp at 2700K at moderate brightness, felt like a living room. Three spaces in 450 square feet. The lighting was what created the spaces.
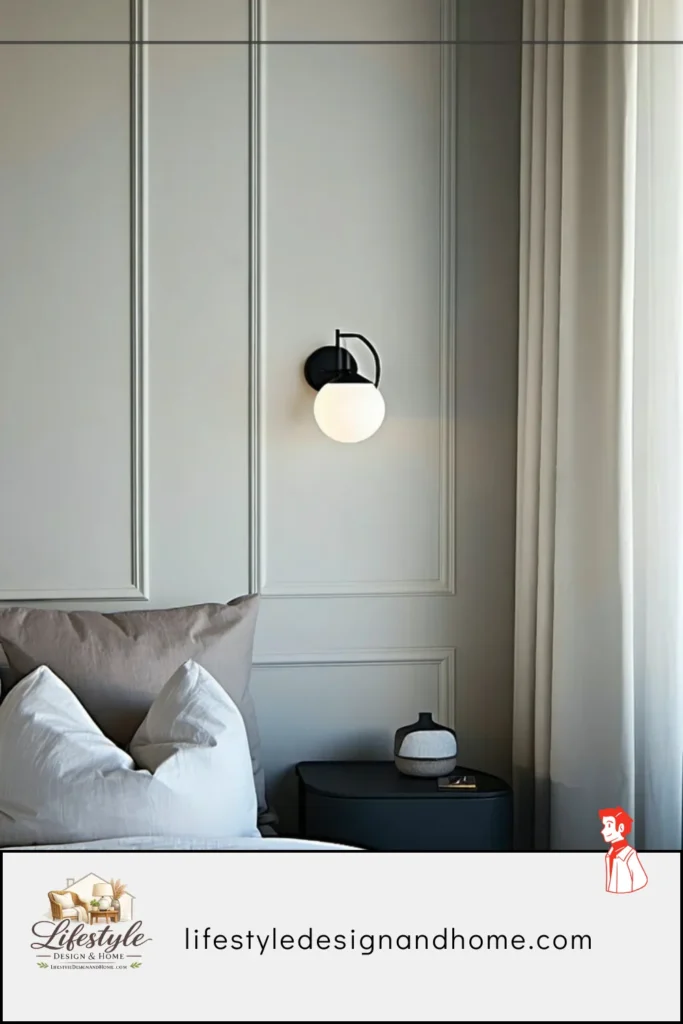
Trick #7: Graze Walls With Light
This one requires either a dedicated wall sconce, a strategically positioned spotlight, or a floor lamp close enough to a wall that its light grazes across the wall’s surface. It is worth the positioning effort because what it does to a room’s perceived size is specific and significant.
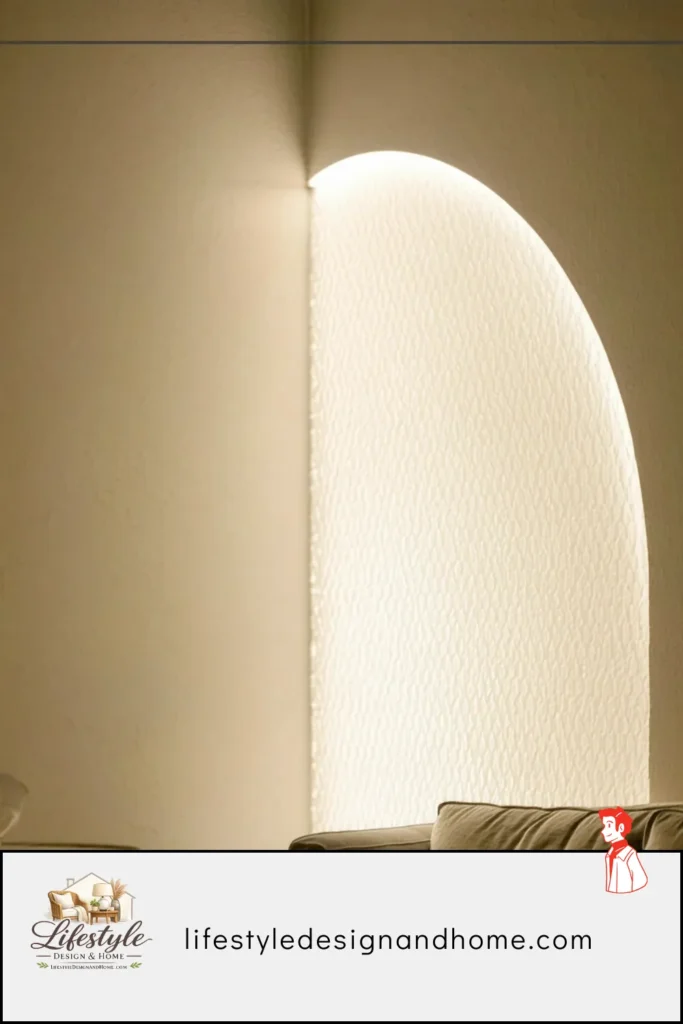
When light hits a wall at an angle — grazing across the surface rather than illuminating it head-on — it reveals the texture of the wall and creates a gradient of light across the surface. The wall goes from bright (near the light source) to progressively darker (away from the light source), creating a sense of depth and dimension that flat, even illumination on the same wall does not.
This gradient is what the brain uses to estimate the size of the illuminated surface. A wall with a light gradient reads as larger than a wall with uniform illumination, because the gradient implies that the surface extends beyond the lit area — that there is more wall continuing into the shadow.
In practical terms, grazing light on a long wall makes the wall feel longer. Grazing light on a low ceiling makes the ceiling feel higher. The technique is borrowed from gallery and museum lighting, where it’s used to make wall-mounted art look larger and more significant, and it translates directly to residential spaces with the same effect.
The practical application: a floor lamp or table lamp positioned 12 to 18 inches from a wall, with the light directed toward the wall at an angle, will graze the wall surface and create this effect. It works best on walls with some texture — painted plaster, textured wallpaper, brick, anything with surface variation — because the texture catches the angled light and creates visible depth.
In the north-facing room, I moved the desk lamp closer to the adjacent wall than task-lamp positioning would normally call for, so that the light it cast on the desk also grazed the wall beside it. The wall appeared to recede. The room felt slightly deeper on that side than it had before.
Trick #8: Match Wall Color and Light Temperature
This is the trick that happens before you buy a single lamp, and it’s the one that most amplifies the effect of every other trick on this list.
The color of the walls in a small room determines how well those walls reflect and distribute light. Light walls reflect more light, distributing it further and more evenly. Dark walls absorb light, creating surfaces that terminate light rather than extending it. In a small room, dark walls that absorb light make the room feel smaller because the absorbed light means fewer secondary sources — the walls aren’t bouncing light around, they’re ending it.
But the specific relationship between wall color and light temperature is more nuanced than “light walls are better.” The wall color and the bulb temperature need to work together. A warm white wall under a 2700K warm bulb produces a rich, amber-warm surface that glows gently and distributes warm light throughout the space. The same warm white wall under a 4000K cool bulb looks slightly yellow and slightly wrong — the cool light and the warm wall color are in conflict and neither looks its best.
The combinations that produce the most spatially effective results:
Warm white or cream walls at 2700K: the ceiling goes warm amber, the walls glow, the floor reads as warmer, the entire room feels enveloped in the specific quality of light that the brain associates with fire and evening rest. The room reads as intimate rather than small. Intimate is the right kind of small.
True white or very light grey walls at 2700K: the warmth of the bulb gives the white walls a very slight amber quality that prevents them from reading as clinical. The walls become the room’s primary light reflectors — they bounce the warm light in all directions and the room feels genuinely bright without being harshly so.
In the north-facing room, the landlord’s off-white walls were slightly cool-toned — not grey, but not warm. Under the original cool overhead they looked dingy. Under the 2700K warm bulbs they looked like warm plaster — a completely different quality that made the room feel significantly more inviting.
Putting It Together: The Full Small Room Lighting System
These tricks work individually. They work better together. Here is how they combine into a complete system for a small room:
Step 1: Replace all bulbs with 2700K, CRI 90+. This is the foundation everything else builds on.
Step 2: Install a dimmer on the overhead fixture. Dim it to 20 to 30 percent. It is now a background ambient source, not the room’s primary light.
Step 3: Add a torchiere floor lamp in the corner opposite the primary window. This addresses the dark zone, lights the ceiling, and makes the room’s far boundary less visible.
Step 4: Position a large mirror on the wall opposite the primary window. It doubles the apparent window and the apparent torchiere. The room has twice as many light sources as it has fixtures.
Step 5: Hang curtains at ceiling height with the rod mounted close to the ceiling and the panels extending past the window frame on both sides. The window appears larger. The room appears large enough to have a large window.
Step 6: Add a secondary lamp at seated height — a table lamp or lower floor lamp — to create the second layer in the lighting system and produce depth through the distance between the near lamp and the far torchiere.
Step 7: If the room serves multiple functions, define zones through different light qualities at different heights.
Result: a room lit from multiple angles, at multiple heights, with warm color temperature, a large reflective surface multiplying the light, and curtains that imply larger windows than exist. The dark zone is addressed. The ceiling is illuminated. The edges are softened. The brain cannot precisely calculate the room’s boundaries and defaults to an impression of more space than is measured
The Afternoon, Revisited
I still think about that north-facing room sometimes. Not because it was a remarkable room — it wasn’t. Because of how little it took to change it.
$180. Four hours, including a trip to the hardware store. Five changes to the lighting. A room that had felt like a box felt like a room.
What I understood after that afternoon, and have not un-understood since, is that the rooms we find difficult — the small ones, the dark ones, the awkwardly proportioned ones — are usually not difficult because of anything structural. They are difficult because of their light. And light is the most controllable variable in any room you inhabit.
You cannot move the walls. You cannot raise the ceiling. In most rentals, you cannot change the flooring or the paint. But you can change every bulb. You can add a floor lamp in a dark corner. You can lean a large mirror against the wall opposite the window. You can hang curtains from the ceiling to the floor.
You can, for approximately $180 and one afternoon, change how the brain reads a room.
That is an extraordinary amount of power to have over a space that isn’t even yours.
Use it.